
How do I update XAMPP without losing something in windows 10? Complete Solution.
Here is an easy to understand, step by step guide to upgrade XAMPP that actually works. In this tutorial, I’ll walk you through the process so you can get XAMPP up-to-date with minimal hassle – and without tearing your hair out.
Why Update XAMPP?
It may leave you wondering why you would bother to update XAMPP at all. Do you even need it?
The biggest reason to update XAMPP is to get access to a newer version of PHP. Since XAMPP doesn’t update automatically, if you have been using XAMPP for a few years, you may be using a version of PHP that is completely out of date. New XAMPP versions are now available in PHP 5.6 and higher.
SOME MAJOR CHANGES!
If you update XAMPP after a long period like me then be prepared for certain major changes. XAMPP does not come with MySQL server anymore. Starting XAMPP v5.5.30 is delivered by MariaDB instead of MySQL. So copy paste the mysql data files of the old to the new XAMPP will no longer work!
One more reason to update is that you should always try to use the same version of PHP in your development environment and live on the web server.
This tutorial will enable you through the process of updating XAMPP without losing any of your WordPress sites.
THE CHALLENGES!
During the update of XAMPP, we face basically 2 challenges.
- Move every file on the site. This portion is easy, just a simple copy paste will do the trick.
- Moving all the databases to the new server. And most of the time, that’s the primary reason most people don’t update XAMPP very often. Saving all databases one by one and then importing them onto the new server is a long and really tedious task.
Process Overview
Updating XAMPP is a six step process:
- Export your databases.
- Backup your website files.
- Uninstall or rename the old version of XAMPP.
- Install the new version of XAMPP.
- Adjust PHP settings.
- Restore your website files and databases.
THE COMPLETE SOLUTION:
Follow the steps below and your XAMPP will be up-dated quickly!
Step 1: Export Databases
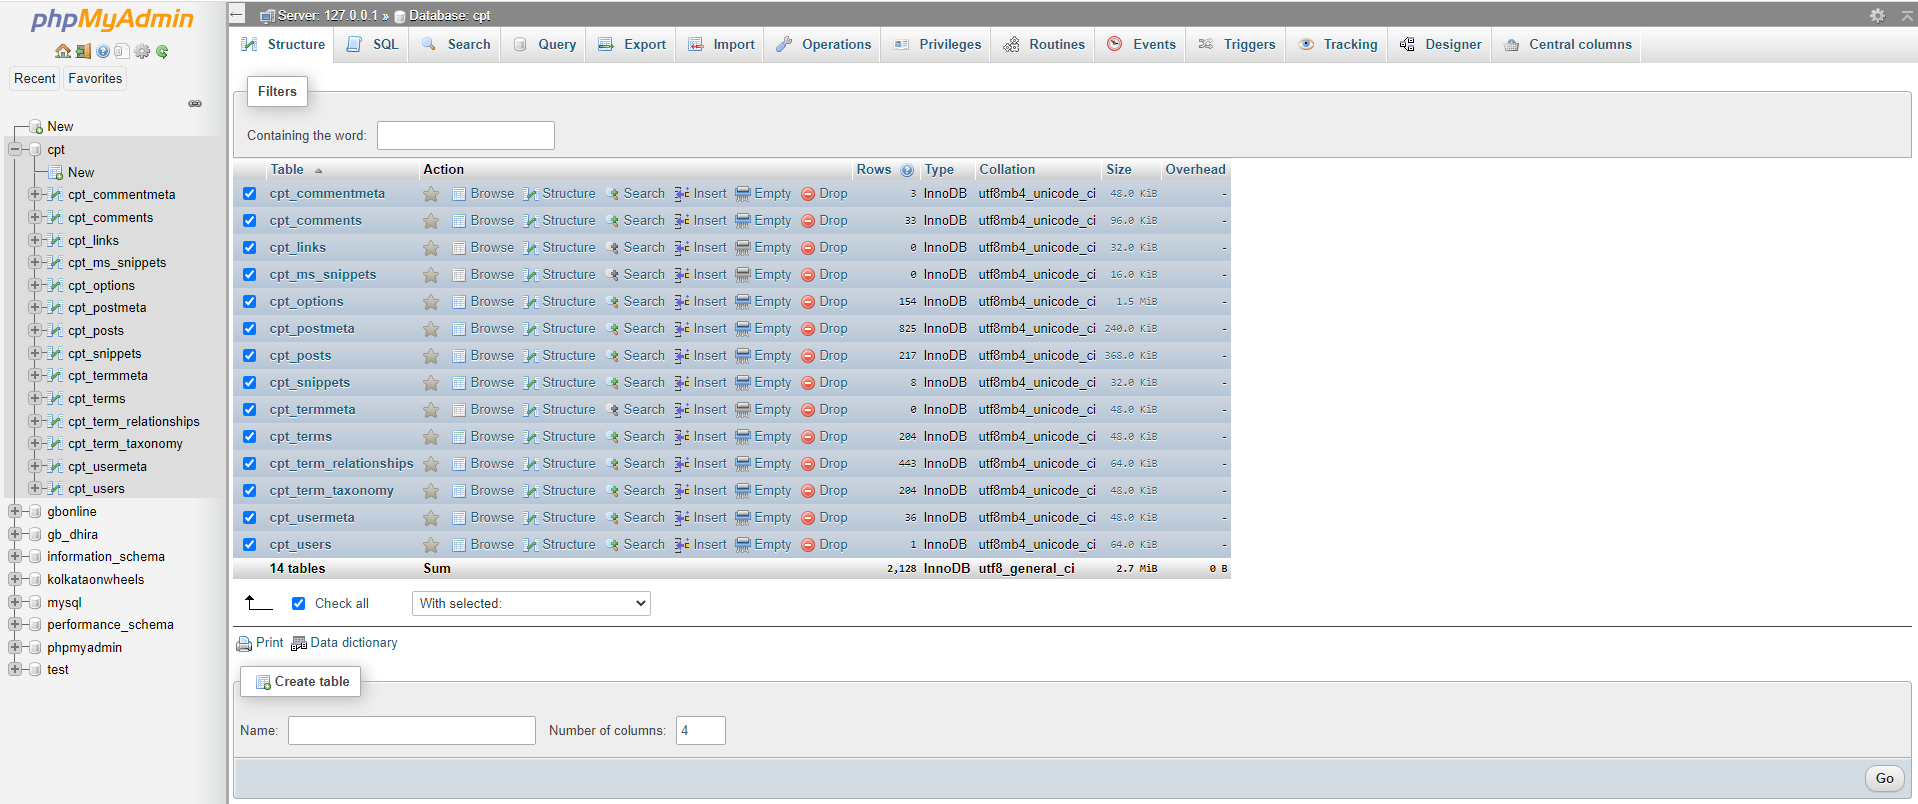
Enable the XAMPP control panel if it is not already running and then navigate to phpMyAdmin. There are several ways to launch phpMyAdmin by using the link in the XAMPP dashboard that appears at http://localhost, by clicking Admin in the MySQL row in the XAMPP control panel, or by just typing http://localhost/phpmyadmin into your browsers address bar.
There are two different options in terms of exporting your databases.
- The first option is to export all of your databases in one SQL file.
- The second option is to export each database individually.
While option one may sound like the easier option, the downside is that since you’ll be working with a larger file you are more likely to run into issues when importing your databases into your new XAMPP installation.
I usually recommend Option Two.
It’s a bit more work to export and import your databases individually, but you’re also less likely to run into errors.
Option One:
Here are the steps to take to download all of the databases at once:
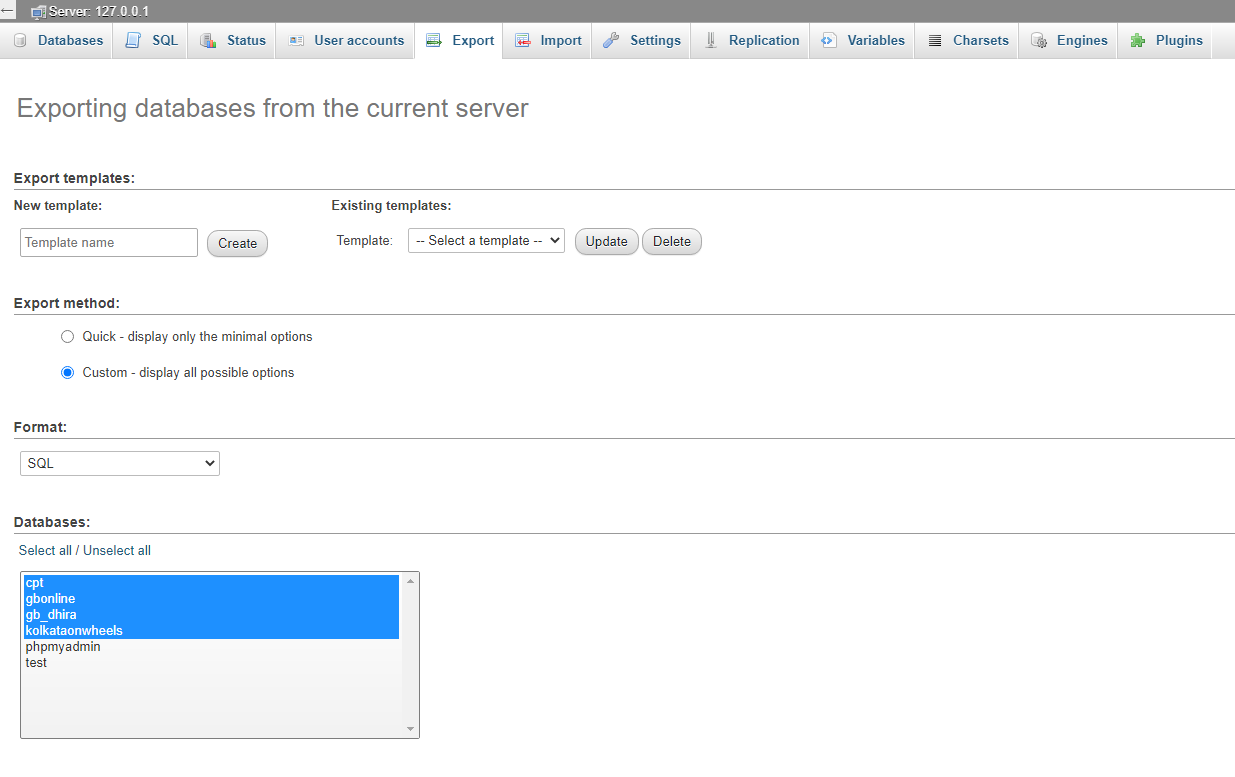
- From the main phpMyAdmin page select Export.
- Select the Custom export method.
- In the Databases section, hold down Ctrl and select all of the databases you wish to export being careful not to select the database named phpmyadmin.
- Scroll to the bottom of the page and click Go.
- Wait for the SQL file to be exported to your computer, and save this file someplace you’ll be able to find it easily later on. Make sure you save it someplace far from the \xampp\ directory tree. .
Option Two:
To download each database individually the process is a little different.
- From the main phpMyAdmin page select the first database you wish to export by clicking on the name of the database where it appears in the list of databases on the left-hand side of phpMyAdmin.
- Next, select Export from the top menu, and at the bottom of the export page click on Go.
Wait for the export to finish and save the file some place, then complete the same process for each database you wish to export.
Now stop both Apache and MySQL servers and quit the XAMPP control panel.
Step 2: Backup Website Files
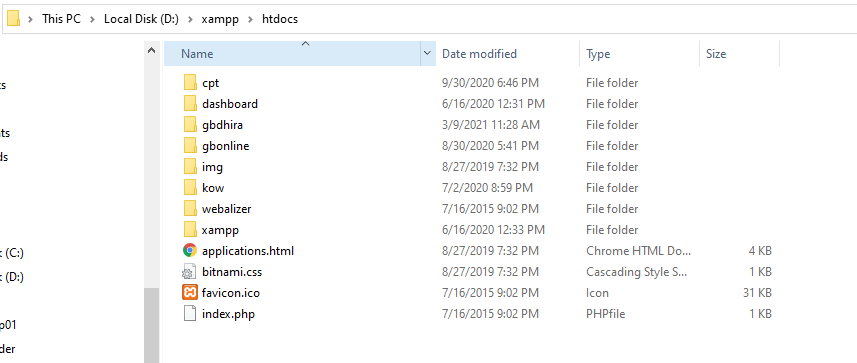
All of your XAMPP website files live inside of the \xampp\htdocs\ directory. If you have more than one WordPress installation or website set up in this folder you’ll have a subdirectory for each installation or website. Take a look at the htdocsdirectory and determine which websites files you wish to keep.
To backup the files you wish to keep, create a new folder and copy the files you wish to keep into the new folder.
Step 3: Uninstall or rename the Old Version of XAMPP
First, before you try uninstalling XAMPP make sure you copied all of your website files and databases. Once you uninstall XAMPP anything you haven’t backed up will be lost. So take a second, go look at your website files and make sure you copied all of the files you wish to keep out of htdocs. Also, verify that you have all of the databases you wish to save. Once you’re certain you have saved a copy of everything you want to save, now stop both Apache and MySQL and exit the XAMPP control panel.
Uninstall XAMPP:
There are three different type of XAMPP are available
- Automatic installer,
- Zip archive,
- 7zip archive.
If you have the installer version you need to use the uninstall script to remove XAMPP.
You’ll find the uninstaller at \xampp\uninstall.exe.
If you are running either the Zip of 7zip version you can safely rename your ‘xampp’ folder to ‘xampp-old’. This way if anything goes wrong you will be able to get back to the old version very easily.
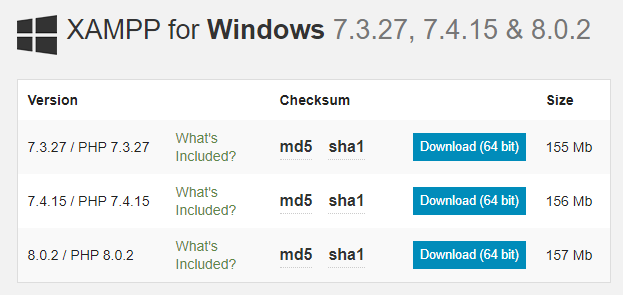
Step 4: Install the New Version of XAMPP
Download the latest version of XAMPP. You can choose your XAMPP download as a installer, 7zip or zip version.
Install it in the same drive where your old XAMPP originally was.
Now go to xampp folder and right click on xampp-control.exe and run as Administrator.
Step 5: Adjust PHP Settings
Start both Apache and MySQL server and check whether they are working properly or not, also check PhpMyAdmin page.
Now open ‘xampp\php\php.ini’ file to any text editor and making the following adjustments to the PHP settings:
Increase max_execution_time to 5000 seconds;
Increase max_input_time to 5000
Increase upload_max_filesize to 750M.
Increase post_max_size to 1000M
Increase memory_limit to 1000M
Make sure post_max_size and memory_limit need to be larger than upload_max_filesize. Make them high enough so big files can work on the server.
Open ‘xampp\phpMyAdmin\libraries\config.default.php’ and
Look for $cfg[‘ExecTimeLimit’]
Increase $cfg[‘ExecTimeLimit’] = 5000
Value ‘0’ for unlimited.
Now restart both Apache and MySQL server.
Step 6: Restore Your Website Files and Databases
Restoring your website files is easy. Simply copy the files and folders you previously backed up and paste them into the new \xampp\htdocs\ folder.
To restore your website databases you’ll need to import the SQL file you exported from the original XAMPP installation.
Go tothe phpMyAdmin and click on New from the list on the left-hand side of the application.
Create a new database being careful to use the exact same name as was used for the original database.
Select the database you just created from the list in the left-hand panel in phpMyAdmin.
Click on Import in the top menu, select the SQL file for the database you wish to import, and click Go.
Once the import is complete, repeat the same process for the next database you wish to import until you’ve imported all of your databases.
Once your database import successfully it’s time to incite XAMPP, start Apache and MySQL and test your websites. Type in http://locahost/website_directory/ just as you have done in the past with your old XAMPP installation to access your websites. All of your old usernames and passwords will still work just fine.